
Renovation condo: what to expect, stage by stage, and what to budget
25 Aug 2026 · YC Design and Build
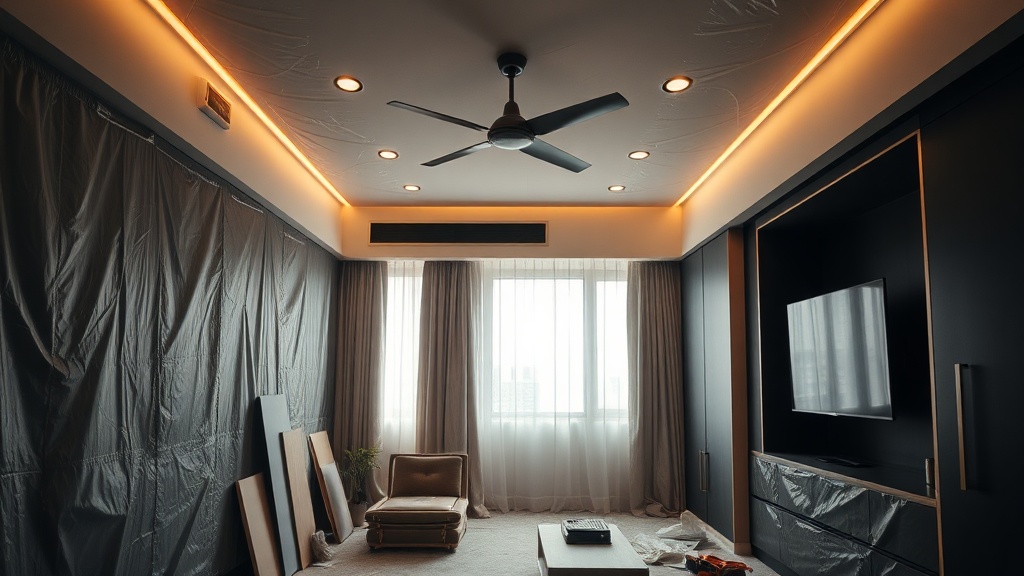
A plain guide to condo renovation in Singapore: the stages, common delays, and what affects your budget.
You have got the keys, or you are about to, and the quotes are all over the place. That is normal. For renovation condo singapore projects, the price swing is wide because some owners are only adding storage and lights, while others are redoing kitchens, bathrooms, flooring and hidden services.
The useful question is not, “How much does a condo renovation cost?” It is, “What scope am I actually buying, in what order, and what usually makes the budget move?” That is what this guide covers.
Renovation condo Singapore: the realistic budget bands
Start with broad planning numbers, not a false precise figure.
For new launch condos, lighter works often fall around S$25,000 to S$70,000. That usually means design, painting, lighting, some carpentry, wardrobes, TV feature, study, minor kitchen adjustments, window furnishings and loose styling. It usually does not mean major hacking or rebuilding wet areas.
For resale condos, fuller renovations commonly land around S$60,000 to S$150,000 and above. The range is broader because older units often need rectification first: uneven floors, leaking pipe boxes, outdated wiring routes, tired bathrooms, damaged tiles, swollen carpentry, failing waterproofing or previous renovation work that has to be undone.
By unit type, market guides in Singapore generally put the bands around these levels:
| Condo type | Typical range | What usually drives it |
|---|---|---|
| New launch, 1 bed or studio | S$15,000 to S$40,000+ | Mainly carpentry, lighting, storage, feature walls, soft upgrades |
| New launch, 2 bed | S$25,000 to S$50,000+ | More wardrobe and kitchen storage, study area, glass works, furnishings |
| New launch, 3 bed | S$30,000 to S$70,000+ | More linear feet of carpentry, more rooms, more electrical points |
| Resale, 2 bed | S$45,000 to S$75,000+ | Partial hacking, kitchen and bathroom works, flooring patch or replacement |
| Resale, 3 bed | S$60,000 to S$95,000+ | Fuller wet works, more rectification, more custom carpentry |
| Resale, 4 bed and larger | S$66,000 to S$150,000+ | Scope depth, finish level, hidden defects, premium custom work |
These are planning ranges, not a rate card. Two 1,000 sqft condos can differ by tens of thousands. One owner keeps the existing flooring and bathrooms. Another hacks the kitchen, rebuilds two bathrooms, adds full-height veneer carpentry and upgrades all air-con routes. Same size, different spend.
A rough market benchmark people use is about S$80 to S$200 per sqft. Treat that carefully. Per-square-foot figures are only useful for early sense-checking. They do not replace a scope breakdown. Carpentry-heavy projects can look expensive on a psf basis even if no hacking is involved. Wet-work projects can also jump fast even when the unit is not large.
What changes the price most
In practice, five things move the budget more than anything else.
1. New launch or resale
This is the big one. New launch units are already in workable condition. The developer has handed over flooring, sanitary ware, doors, windows, kitchen cabinets and appliances, even if you do not love the choices. So the job is often additive.
Resale units are different. Before design starts, you may need to remove old finishes, repair damaged substrates and correct problems you only see after demolition. This is why resale budgets need more contingency.
2. Wet works
Wet works means trades involving water, cement, screed, tiling, waterproofing and plumbing changes, usually in kitchens, bathrooms, service yards and sometimes balconies. These are slower, more regulated and less forgiving than paint and carpentry.
If you are retiling a bathroom, moving floor traps, changing pipe runs or rebuilding shower kerbs, the price climbs quickly. The trade-off is simple: wet works can transform an old unit, but they take time and they carry more risk if badly done.
3. Carpentry quantity and finish
Condo owners often underestimate this. In smaller homes, storage is not a luxury, it is the plan. Wardrobes, kitchen tall units, vanity cabinets, study tables, shoe cabinets, TV walls, bay window storage and concealed service doors add up fast.
The cost moves with:
- linear feet and height of cabinets
- internal fittings and accessories
- laminate versus veneer or other upgraded finishes
- curved details, fluted panels, open niches and display lighting
- whether the design is standard module based, or heavily customised
The trade-off: custom carpentry gives a tighter fit and better use of space, but it is one of the fastest ways to grow a quote.
4. Electrical and air-conditioning changes
Electrical is not just “add a few sockets”. Once you change furniture layout, you often change where power, data, switches and lighting need to go. Cove lights, pendant lights, track lights, bedside controls, vanity lights and kitchen appliance loads all add up.
Air-con matters too. If existing fan coil units, drainage, trunking routes or condenser positions need adjustment, the budget shifts. In condos, this also interacts with building rules and access.
5. Building rules and logistics
Condo work is not only about the unit. The management office, often called the MCST, may control working hours, lift protection, noise periods, debris disposal, contractor registration, worker pass procedures, deposits and approvals for certain works.
This does not always make the job dramatically more expensive, but it can affect programme, labour planning and what can be done in one day.
Stage by stage: what to expect from a condo renovation
Most first-time owners think of renovation as one block of time. It is easier to manage if you split it into stages. Each stage has its own decisions, risks and payment logic.
Stage 1: Brief, survey and budget reality check
This is where you decide what problem the renovation is solving.
Common answers are:
- we need more storage
- the kitchen does not work for how we cook
- the bathrooms are old or leaking
- we want one room converted to study or nursery
- the whole resale unit feels dated and needs a reset
A proper site survey should check actual dimensions, level differences, existing service positions and obvious defects. On resale units, this matters because drawings from old sale listings are often not enough.
At this stage, be honest about your budget range. Not your ideal number, your actual ceiling. If your budget is S$50,000 for a 3-bed resale but your wishlist includes full kitchen rebuild, two bathroom overhauls, full retiling, full carpentry and upgraded appliances, someone has to cut scope, quality level, or both.
That is not bad news. It is just the first useful decision.
Stage 2: Design development and scope lock
Now the layout, materials and built-ins get defined. This is where many owners lose control of the budget, because everything still looks possible on paper.
You should come out of this stage knowing:
- what is being hacked and what is staying
- which floors and walls are being retiled, overlaid or left alone
- what carpentry is built-in, and roughly how much of it
- how many bathrooms are touched
- whether the kitchen is cosmetic, partial or full rebuild
- whether electrical is minor adjustment or full rework
“Overlay” means installing a new finish over an existing one, subject to condition and build-up limits. It can save time and debris, but it is not always suitable. If the base is hollow, badly laid or already too high at door thresholds, overlay can create new problems.
The trade-off: keeping more existing finishes saves money up front; replacing them reduces the chance of old defects returning through a new design.
Stage 3: Quotations, comparisons and value engineering
This stage is where quotes often appear impossible to compare. One is S$38,000, one is S$62,000, one is S$91,000. That usually means the scopes are not matched.
Compare line by line. Ask:
- Is demolition included?
- Is debris removal included?
- Are waterproofing and water retention tests included where relevant?
- Are electrical points counted clearly?
- Are light fittings included, or wiring only?
- Are sanitary fittings supplied by owner or contractor?
- Are appliances included?
- Is painting full unit, partial, or touch-up only?
- Is quartz, sintered stone or solid surface specified, or left vague?
Value engineering means reducing cost without pretending nothing changed. Good examples are:
- cut one non-essential feature wall, keep the wardrobe
- use laminate instead of veneer on internal-facing cabinetry
- keep sound floor tiles in bedrooms, focus budget on kitchen and baths
- use standard cabinet modules where hidden, customise only exposed areas
Bad value engineering is pushing cost out of the quote and into variation orders later.
Stage 4: Approvals, submissions and building coordination
Before work starts, condo projects usually need coordination with the management office. The exact process depends on the development.
You should expect some or all of the following:
- renovation application forms
- contractor and worker registration
- lift padding and common area protection arrangements
- refundable deposits or administrative fees, depending on MCST rules
- restricted hours for noisy works such as hacking
- approval requirements for glazing, external-facing changes or service relocations
There may also be wider legal and safety requirements under Singapore rules for construction safety, manpower and building works, depending on the nature of the job. For a homeowner, the practical point is simple: do not assume that because something is inside your unit, it can be altered without checks.
If you are changing anything structural or anything affecting shared services, that is not a casual design decision.
Stage 5: Demolition and making safe
This is the messy part. Old carpentry comes out. Selected tiles or walls are hacked. Ceilings may be opened. Existing defects start to show.
On a resale unit, this is often the stage where hidden costs appear. Common discoveries include:
- water-damaged cabinet backing
- uneven floor levels
- cracked screed under tiles
- old plumbing routes that do not match assumptions
- electrical runs that limit the new layout
This is why a contingency matters. For a straightforward new launch with light works, contingency may be modest. For a resale condo with demolition and wet works, a larger buffer is safer.
Stage 6: Wet works, masonry and services
After demolition, the core trades go in. This stage often includes:
- masonry wall adjustments where permitted
- floor screeding, which is levelling with a cement-based layer
- waterproofing in bathrooms and other wet areas where needed
- tiling
- plumbing rough-in
- electrical rewiring or point relocation
- air-con piping and drainage adjustments
This stage matters more than the decorative stage. Nice laminates cannot cover poor substrate work for long. If a bathroom has waterproofing issues, the fact that the vanity looks expensive will not help.
For owners, the main expectation is that progress can look slow here. That does not always mean nothing is happening. Wet trades need sequence, curing time and checks.
Stage 7: Ceilings, painting, doors and finish surfaces
Once the wet and hidden works are stable, the job starts to look like a home again.
This stage can include:
- plaster or false ceiling work
- painting
- floor finish protection or installation
- door and frame works
- glass installation
- feature finish touch-ups
A false ceiling is a dropped ceiling built below the structural slab. It is used to conceal services, create cove lighting or improve visual proportions. The trade-off is height. In a condo with already modest ceiling clearance, every design move overhead should be justified.
Stage 8: Carpentry fabrication and installation
Most built-in carpentry is measured after site conditions are confirmed, then fabricated off-site, then installed on-site. This is why carpentry is often later in the programme than owners expect.
During installation, check practical items, not just colour:
- door swing and clearance
- drawer access next to walls or handles
- internal shelf heights for real items you own
- service access panels that remain reachable
- alignment with electrical outlets and appliance dimensions
A beautiful cabinet that blocks maintenance access is bad planning.
Stage 9: Final fixtures, testing and defects
This is where sanitary fittings, appliances, lights, switches, accessories and silicone works are completed. Then the testing starts.
You want to check:
- all lights and switches
- all sockets and appliance points
- water pressure and drainage
- floor falls in showers
- cabinet alignment and door closure
- paint touch-ups
- tile chips or hollow sounds where relevant
- glass scratches
Expect a defects list. Almost every project has one. The issue is not whether defects exist. The issue is whether they are minor closing items, or signs of rushed workmanship.
Stage 10: Handover and aftercare
Handover is not just collecting keys to your own unit again. You should receive clarity on what was done, what owner-supplied items were installed, what maintenance points matter and what defects liability arrangement applies under your contract.
Keep all finish selections, appliance models and paint references. Months later, when you need to replace one damaged laminate panel or match a wall colour, that record saves time.
How long does a condo renovation usually take?
There is no single answer because scope drives time.
A light new launch fit-out with mostly carpentry, painting, lights and minor additions may take a much shorter period than a full resale overhaul. A resale condo renovation involving hacking, bathrooms, kitchen rebuilding and rectification can take materially longer because demolition, approvals, wet works and fabrication all stack up.
The trade-off is straightforward: the more you alter fixed finishes and services, the longer the programme and the more coordination is required.
When planning your move, leave margin. Do not arrange disposal of all your old furniture, delivery of every new item and your move-in date on the most optimistic schedule.
Where first-time owners overspend
Most budget blowouts are not caused by one big luxury item. They come from many small decisions made late.
Changing the layout after works start
Moving a socket on paper is one thing. Moving it after hacking or painting has progressed is another. Late changes create rework, delay and waste.
Underestimating bathrooms and kitchen scope
These spaces carry the most expensive trades. If your plan includes “just make it nicer” but the actual requirement is new tiles, new waterproofing, new plumbing points and new carpentry, the original allowance was not real.
Too much custom carpentry
Built-ins are useful. Over-designed built-ins are expensive. Internal drawers everywhere, curved open shelves, display niches with integrated lighting and decorative fluted panelling can add cost without adding much storage.
Buying materials without checking site dimensions
Owner-supplied basins, appliances, mirrors or light fittings can be fine, but only if dimensions, fixing requirements and lead times are checked against the actual design. Otherwise the contractor ends up adapting the site around an item that does not fit well.
Ignoring maintenance
Open shelving looks clean in renders. In actual homes, it collects dust. Dark grout looks sharp at handover. It may show soap residue fast. Thin-profile sinks and special finishes may cost more and wear differently. The right choice is the one you are willing to live with, not just photograph.
How to set a budget that matches the flat
Use three buckets.
- Core works: demolition, wet works, electrical, plumbing, flooring, painting, essential carpentry.
- Nice-to-have works: feature wall upgrades, premium laminates, decorative lighting, extra display units.
- Contingency: for unknowns, especially in resale units.
If your total number is tight, protect the first bucket. That is the part that affects function and longevity.
A practical way to brief your contractor is to mark each item as one of these:
- must keep
- can reduce
- can postpone
For example, rewiring the kitchen properly may be a must keep. A full-height fluted TV wall may be can postpone.
New launch versus resale: how to decide where the money goes
| Item | New launch condo | Resale condo |
|---|---|---|
| Main budget focus | Storage, layout support, lighting, styling, selected upgrades | Rectification first, then kitchen, bathrooms, flooring, services, carpentry |
| Hidden risk | Over-spending on cosmetics | Under-budgeting for defects and wet works |
| Best savings lever | Keep developer finishes where they are acceptable | Limit hacking to areas that genuinely need replacement |
| Common mistake | Replacing usable items too early | Trying to “patch” failing old work that should be rebuilt |
If you have bought a new launch, the cheapest square foot to renovate is the one you leave alone. If you have bought an older resale condo, the most expensive mistake is often trying to save a wet area that has already reached the end of its useful life.
What to prepare before asking for quotes
You will get better answers faster if you prepare these five things:
- a floor plan with unit size
- photos or videos of the current condition
- a list of must-have works
- a rough target budget range
- your intended move-in timeline
If it is a resale unit, include any known issues: leaks, cracked tiles, noisy drainage, damaged parquet, old air-con routes, mould, or windows that need attention. This helps the contractor judge risk earlier.
FAQ
How much should I budget for a condo renovation in Singapore?
As a planning range, many new launch condos with lighter works fall around S$25,000 to S$70,000. Fuller resale projects commonly start around S$60,000 and can run to S$150,000 or more. The biggest cost drivers are whether the unit is new or resale, how much hacking and wet work is involved, how much carpentry you want, and the finish level.
Is it cheaper to renovate a new launch condo than a resale condo?
Usually, yes. A new launch often already has usable flooring, bathrooms, kitchen cabinets and doors, so the renovation is more about adding storage and improving layout. A resale condo may need demolition, repairs, updated services and wet-area rebuilding before the design layer even starts.
What is the most expensive part of a condo renovation?
In many projects, the biggest spend comes from a combination of wet works and carpentry. Bathrooms and kitchens cost more because they involve waterproofing, tiling, plumbing and careful coordination. Custom built-in storage can also become a major cost if it is extensive or heavily detailed.
If you want, ask YC about your own flat.
Read next
- Old 3 room HDB renovation: what to expect, stage by stage, and what to budgetOld 3 room HDB renovation, stage by stage: what gets checked first, where delays happen, and what usually moves the budget.Property Types
- Commercial renovation: what to expect, stage by stage, and what to budgetA practical guide to commercial renovation, from planning and permits to handover, with what affects cost and timing in Singapore.Property Types
- 4-room BTO renovation ideas: what to expect, stage by stage, and what to budgetPractical 4-room BTO renovation ideas, what each stage involves, and how budget shifts with layout, carpentry, services and finishes.Property Types
Tell us what you are working with.
Send us the unit type and a rough idea of what you want done. We will come back with what it takes.