
Condominium interior design: how to get it right in a Singapore home
16 Sep 2026 · YC Design and Build
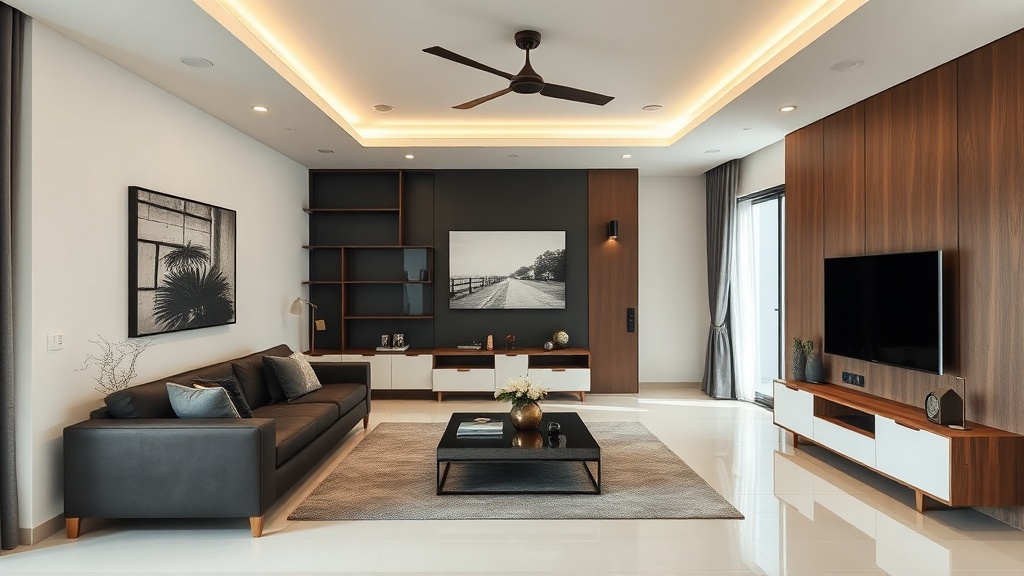
Practical guide to planning a condo renovation in Singapore, from layout limits and approvals to budgeting, materials and contractor coordination.
Most owners start with the same question: how much should condominium interior design singapore actually cost, and what are you paying for. The hard part is that a condo can be a light fit-out or a full rebuild inside the unit, and the price difference is large. If you do not separate design decisions from construction work, it is easy to overspend on the wrong things.
At YC, we come from the contractor side first. That matters in condos. Drawings are one part. Access rules, hacking limits, electrical loading, wet-area work, lift protection and manpower planning are the other part. If the design ignores those, the quote looks neat at the start and turns messy later.
What condominium interior design means in a Singapore condo
For a condominium, interior design is not only picking colours, tiles and carpentry. It is deciding how the home should work, then checking what can actually be built inside a private apartment with management rules, building services and neighbours around you.
In practice, most condo projects in Singapore fall into three broad groups:
- New developer-finished unit: floors, doors, bathrooms and kitchen basics are already there. The usual work is carpentry, lighting changes, paint, some loose furniture, feature finishes and minor layout tuning.
- Resale unit with usable condition: some existing finishes stay, some go. Often there is partial hacking, new wardrobes, kitchen replacement, electrical additions and bathroom updates.
- Resale unit needing full overhaul: hacking, retiling, rewiring, plumbing changes, waterproofing to wet areas where required, ceiling work, air-con replacement and full carpentry.
The trade-off is simple: the more you keep, the less you spend, but the more you need to design around existing limitations. The more you replace, the cleaner the final result, but cost and time go up.
How much condominium interior design singapore usually costs
For mainstream full projects in Singapore, condo renovation and interior work commonly lands around S$40,000 to S$150,000+, depending on size, scope and finish level. Luxury condos can go much higher, from S$350,000 upward and in some cases beyond S$1 million when the brief includes extensive custom work, premium materials and large floor areas.
Those numbers only become useful when you tie them to the type of unit.
| Unit type | Typical broad range | What usually drives it |
|---|---|---|
| New 1 to 2 bed condo | S$15,000 to S$50,000+ | Mostly carpentry, lighting, paint, loose furniture, minor upgrades |
| New 3 bed condo | S$32,000 to S$68,500+ | More rooms, more wardrobes, kitchen additions, ceiling and electrical work |
| Resale 2 bed condo | S$45,000 to S$75,000+ | Hacking, rectification, bathroom and kitchen replacement |
| Resale 3 bed condo | S$60,000 to S$105,000+ | Full or near-full renovation, rewiring, retiling, custom carpentry |
| Large 4 bed, penthouse, high-spec condo | S$80,000 to S$150,000+, sometimes far more | Size, material grade, design complexity, wet-area work, bespoke joinery |
For a simpler way to read it:
- Basic fit-out: around S$40,000 to S$60,000. Usually for newer condos where you keep most original finishes.
- Full mainstream renovation: around S$60,000 to S$90,000. More replacement work, more carpentry, more services.
- Premium mainstream renovation: around S$90,000 and above. Better materials, more custom work, more detailed lighting and storage.
- Luxury interior works: S$350,000 and above. This is a different category, not just a bigger version of a standard job.
Resale units usually cost more than new units. That is not because the design is fancier. It is because old work has to come out, defects have to be corrected and hidden conditions only show up after opening things up.
Why one condo costs S$45,000 and another costs S$120,000
Owners often compare by bedroom count. That is too rough. A 3-bed condo can be a light S$40,000 job or a S$100,000-plus job depending on what you touch.
1. New unit or resale unit
This is usually the biggest cost divider. A new developer-finished condo may only need:
- built-in wardrobes or TV console
- kitchen top-up carpentry
- paint
- lighting changes
- curtains
- some ceiling work
A resale unit may need all of this first:
- hacking of tiles, cabinets or walls where allowed
- debris removal
- electrical rewiring or additions
- plumbing replacement
- bathroom repairs
- surface levelling
- water seepage checks
- air-con replacement
The trade-off: resale gives you more room to change the home properly, but you pay for removal and repair before the new work even starts.
2. Scope of work
Many budget overruns happen because the word "renovation" means different things to different people. To one owner it means wardrobes and lights. To another it means new bathrooms, a rebuilt kitchen and new flooring throughout.
Ask every quote against the same scope:
- Are floors staying or changing.
- Are bathrooms staying or changing.
- Are you moving plumbing points.
- Are you changing DB-related electrical circuits. The DB is the distribution board, the main electrical panel in the unit.
- Are you building false ceilings.
- Are loose furniture, curtains and appliances included.
3. Material and finish level
This is where two homes with the same layout split in cost. The difference may come from:
- laminate versus veneer
- standard solid surface versus sintered stone or natural stone
- off-the-shelf fittings versus premium branded fittings
- basic tile selection versus imported large-format tiles
- standard paint system versus more specialised finishes
There is nothing wrong with spending on finishes, but do it knowingly. Expensive materials do not fix a poor layout. Good planning usually matters more than one premium surface.
4. Custom carpentry
Carpentry is one of the easiest places to overspend because it feels useful. Storage is useful. Hidden storage is useful. Full-height storage is useful. But once every wall becomes a cabinet wall, the budget disappears quickly.
Built-ins are worth more when they solve a real space problem:
- awkward corners
- service ledges
- household shelter walls inside usable rooms
- small bedrooms that need a bed plus wardrobe plus desk
They are worth less when they simply replace furniture that could have been movable.
5. Condo management constraints
This is often ignored at quotation stage. In condos, work hours may be restricted. Lift usage may need booking. Common areas need protection. Wet and noisy works may have tighter timing. All this affects labour planning and programme length.
It may not always appear as a line item called "MCST constraint". It still affects cost.
Where to spend, and where to hold back
If you have not renovated before, it helps to rank work in order of pain. Spend first on the things that are hardest to change later.
Spend first on layout, services and wet areas
- Electrical planning: enough power points, proper switching, task lighting, data points if needed. Adding later means opening walls or trunking.
- Kitchen workflow: fridge, sink, hob and prep space should make sense. A good kitchen does not need to be large, but it has to be usable.
- Bathroom function: slope, waterproofing, shower screen details, storage, ventilation. A nice bathroom that traps water is still a bad bathroom.
- Air-con planning: routing, drainage and access for servicing matter.
- Lighting: not just decorative fittings. General light, task light and night light should each have a reason.
Hold back on easily replaceable items
- feature walls with no storage or service role
- too many decorative light fittings
- excessive built-in shelving for display only
- trendy finishes you may tire of quickly
- movable furniture that can be bought later instead of built immediately
The trade-off: built-in work gives a cleaner look on day one, but loose furniture keeps future flexibility and lowers upfront cost.
Getting the style right without forcing the home
Most owners start with a style label: modern luxury, japandi, contemporary, minimalist, wabi-sabi, Scandinavian. Labels help narrow references, but they do not solve space planning. A condo should first suit the unit's shape, light and storage needs.
Small new condos
These usually benefit from restraint. Lighter finishes, fewer material changes and cleaner lines tend to make the space read larger. This does not mean everything must be white. It means fewer interruptions.
Useful moves include:
- keep the original flooring if it is in good condition and works with the scheme
- use one carpentry language through living and bedrooms
- limit feature materials to one or two strong elements
- avoid bulky partitioning unless privacy is a real need
Older resale condos
These often have larger rooms and better proportions, but they may come with dated finishes, odd built-ins or old service runs. Here the opportunity is different. You may gain more by correcting layout issues than by adding decorative layers.
Examples:
- opening up a kitchen where rules and structure allow
- removing clumsy platform or bay window treatment
- reworking a master wardrobe zone properly
- simplifying heavy ceiling designs from previous renovations
The style should follow the correction, not the other way round.
Common condo renovation mistakes that waste money
Designing before measuring how you live
A nice drawing is not yet a workable home. Before the first layout, list what actually happens in the unit:
- How many people work from home.
- Whether anyone cooks daily.
- Whether shoes, bags, sports gear or cleaning items need hidden storage.
- Whether elderly family members need safer bathroom access.
- Whether children will outgrow a room in two years.
Without this, owners often pay for beautiful but low-use spaces.
Overbuilding storage
Storage is good. Dead storage is expensive. If upper cabinets are too deep, too high or blocked by light fittings, they become a place for forgotten things. Measure what you own first. Build around that, not around a vague idea of "more storage".
Keeping poor-quality existing finishes for the wrong reason
Sometimes owners keep old flooring or kitchen cabinets only to save money, then spend more later trying to patch around them. Savings are real only if the existing item is in acceptable condition and fits the new work.
Good question to ask: if we keep this item, does it save enough to justify the compromise in look, function and future maintenance?
Changing too many things in a new condo
This is the opposite problem. A new condo already comes with paid-for finishes. If you hack out sound tiles, sanitary fittings or doors just to start clean, cost jumps very quickly. Sometimes the better approach is selective overlay and better planning around what exists.
Not checking management requirements early
Condo projects run under house rules from the management body, often called the MCST, the Management Corporation Strata Title. These may cover working hours, deposits, approved contractors for certain tasks, protection requirements, lift booking and renovation periods.
If you only check after design is fixed, some ideas may need rework. This wastes time and consultant hours.
Underestimating electrical work
Electrical additions are common because developer layouts rarely match how owners use the home. The mistake is assuming lights and power points can be adjusted casually at the end. Good electrical planning should happen with furniture planning and ceiling planning, not after.
What to ask before you accept a quote
A condo quotation should not just show one total amount. It should let you understand what is included, what is excluded and what is provisional. "Provisional" means the figure is an allowance, not a final confirmed amount.
Ask these questions plainly:
- What exactly is being demolished, and what is being kept.
- How many electrical points, lighting points and switches are included.
- Are plumbing relocations included.
- What carpentry carcass, laminate and internal hardware are specified.
- Are stone tops, glass, mirrors and metalwork included or separate.
- What site protection and haulage are included.
- What approvals, submissions or management coordination are required from the condo side.
- What happens if hidden conditions are found after hacking.
A cleaner quote is not always the cheaper quote. Sometimes it is simply the more complete one.
Condo rules and practical constraints that shape design
Rules vary by development, so no article can replace the actual house rules for your condo. But in general, condo projects in Singapore are shaped by two layers: statutory requirements and building management requirements.
Building management, access and neighbour impact
Management rules commonly affect:
- allowed working hours
- weekend or public holiday restrictions
- delivery timing
- lift booking
- corridor and lobby protection
- debris removal routes
- deposits and paperwork
For owners, this means your ideal timeline may not match actual site conditions. A contractor with their own workers can plan around this better than a chain of loosely coordinated sub-contractors, but the restrictions still exist.
Wet areas and service points
Kitchens and bathrooms are costly because they involve multiple trades in a small area: demolition, plumbing, tiling, waterproofing where required, carpentry, stone work, electrical and accessories. Moving a sink or WC position is not just a design decision. It depends on routing, falls, slab condition and management acceptance where relevant.
That is why wet-area changes should be decided early. Late changes here are expensive.
Hacking and structural limits
Not every wall can be removed. Some walls are structural. Some contain services. Some changes may need formal review. Owners should never assume that a "more open concept" brief is automatically buildable just because it looks straightforward on a floor plan.
A contractor-minded design process checks buildability before selling the idea.
A practical way to plan your condo project
Stage 1: Decide what problem you are solving
Start with three lists:
- Must fix: poor storage, bad kitchen, ageing bathrooms, not enough power points.
- Nice to have: feature finishes, decorative lighting, special glass or metal details.
- Can wait: movable furniture, art, some accessories.
This keeps the budget on function first.
Stage 2: Survey the unit properly
Old units especially need proper site measurement and condition review. Existing drawings may not match site perfectly. Levels may vary. Box-ups may hide pipes or beams. If the survey is poor, carpentry and stone work will suffer later.
Stage 3: Freeze layout before picking finishes
Many owners enjoy material selection more than layout work. That is normal. But the expensive mistakes usually come from layout changes after electrical and ceiling plans are already moving.
Lock these first:
- major furniture positions
- door swings
- carpentry sizes
- appliance sizes
- power point locations
- air-con positions
Stage 4: Price by scope tiers
Instead of one budget, price the project in tiers:
- Tier A: essential works only
- Tier B: essential plus comfort improvements
- Tier C: full desired outcome
This makes trade-offs visible. It is better than signing a full wish-list quote and trying to trim blindly later.
Stage 5: Keep a contingency
For resale units especially, keep a contingency because hidden issues can appear after demolition. The exact amount depends on condition and scope. A very new unit with light fit-out needs less buffer than an older resale unit with heavy hacking and wet-area work.
If someone gives you a fixed number with no discussion of condition risk, ask what assumptions they have made.
What a direct contractor approach changes
There are two broad ways these projects are commonly run. One is design first, then most site work is passed along through external trades. The other is a contractor-led build process with design integrated into it.
YC sits in the second camp. That changes a few things for the owner:
- Drawings are checked against site reality earlier: because the people planning the work also think about hacking, electrical routes and installation sequence.
- Fewer handovers: fewer layers usually means fewer chances for details to get lost between designer, coordinator and trade crew.
- Quieter problem-solving on site: when conditions change, the answer can come from the build side quickly.
- Trade-offs are easier to state honestly: if a detail is expensive to execute for little gain, it should be said clearly.
This does not mean every idea becomes cheaper. Some things are simply labour-heavy and should be priced as such. But it does mean the quote can be grounded in how the work will actually happen.
How to judge if a condo design is right, before work starts
By the time you approve a design, you should be able to answer yes to most of these:
- Do I know what I am keeping and what I am replacing.
- Do I understand why each built-in item exists.
- Have kitchen and bathroom functions been resolved, not just styled.
- Are electrical points tied to actual furniture and appliance use.
- Has the condo's management process been considered.
- Do I know which materials matter most, and which are optional upgrades.
- Is the quote detailed enough that I can compare it properly.
If not, do not rush into finishes. Go back one step and fix the brief.
FAQ
How much should I budget for a condo renovation in Singapore?
For mainstream projects, a broad working range is often around S$40,000 to S$150,000 or more, depending on unit size, whether it is new or resale, and how much you are replacing. New condos with lighter fit-out can be lower. Resale condos with hacking, rewiring and wet-area work usually cost more.
Why do resale condos cost more to renovate than new condos?
Because resale units often need removal and repair before new work starts. That can include hacking old finishes, rectifying defects, replacing old electrical and plumbing runs, redoing bathrooms and dealing with hidden site conditions. In a new condo, many original finishes can often be kept if they suit the design.
Should I keep the developer finishes in a new condo or replace them?
It depends on condition, style fit and your budget. If the flooring, doors, sanitary fittings and kitchen base are serviceable, keeping them can save a substantial amount. The trade-off is that the design has to work around those existing items. Replacing them gives a cleaner reset, but cost rises quickly.
If you want, ask YC about your own flat.
Read next
- Choosing an office interior design company: what to ask before you commitHow to choose an office firm in Singapore: what to ask about scope, budget, timeline, site work and who is actually doing the build.Design Styles
- Commercial interior design: how to get it right in a Singapore homeCommercial interior design can work in a Singapore home if you get the layout, materials and lighting right, and accept the trade-offs.Design Styles
- Interior design condo: how to get it right in a Singapore homeHow to plan a condo renovation in Singapore: layout, approvals, budget, and what changes when your designer and builder are the same team.Design Styles
Tell us what you are working with.
Send us the unit type and a rough idea of what you want done. We will come back with what it takes.