
BTO renovation 4 room: what to expect, stage by stage, and what to budget
19 Aug 2026 · YC Design and Build
A practical guide to a 4-room BTO renovation: stages, likely costs, timeline trade-offs, and what affects the budget.
You get the keys, walk into a brand new flat, and still have to make a hundred decisions before you can move in. That is why bto renovation 4 room planning often feels harder than people expect. The flat is new, but it is not finished for your daily life.
The main questions are simple: what usually gets done, what order it happens in, how long each stage takes, and what budget is realistic without guessing. This guide breaks it down the way a contractor would, stage by stage, with the trade-offs made clear.
BTO renovation 4 room: the budget most owners actually work within
For a full 4-room BTO renovation in 2026, most published market ranges cluster around S$40,000 to S$65,000. That usually covers the core items many owners want: kitchen carpentry, wardrobes, electrical works, painting, window coverings, some flooring changes or overlays, and bathroom accessories or upgrades.
At the low end, some owners spend around S$25,000 to S$35,000. That usually means a lighter scope: less carpentry, very limited hacking, fewer custom details, and more acceptance of what the developer already handed over.
At the upper end, costs can move to S$80,000 to S$100,000 and above. That normally comes from a bigger scope, not just a different style. More built-ins. More reworking. More premium finishes. More electrical points. More bathroom and kitchen changes. Sometimes more labour coordination as well.
If you are trying to decide where you sit, this is the practical way to think about it:
- S$25,000 to S$35,000: basic move-in renovation, controlled carpentry, minimal changes.
- S$40,000 to S$65,000: typical whole-home setup for a couple or family, with custom storage and a complete kitchen.
- S$80,000+: extensive custom work, more premium surfaces, and more things rebuilt rather than accepted as-is.
These are not fixed package truths. They move based on scope. The same 4-room flat can swing by tens of thousands simply because one owner wants loose furniture and open shelving, while another wants full-height carpentry in every room.
What moves the budget most
- Carpentry: usually the biggest cost driver. Kitchen cabinets, wardrobes, shoe cabinets, TV consoles, study tables, tall storage, bomb shelter cladding.
- Flooring and tiling: vinyl costs less than full retiling. Bathroom and kitchen tile works add up quickly.
- Bathrooms: two toilets means two sets of decisions, fittings, accessories and waterproofing-related constraints.
- Electrical works: extra power points, lighting points, heater points, cooker points and data points can add up fast.
- Hacking and rebuilding: whenever you remove and redo, labour, disposal and reinstatement costs follow.
- Material tier: compact laminate, quartz, sintered stone, basic laminate, premium laminate, tile size, track lights, tapware, all affect final cost.
If you want one rule of thumb, use this: the more you customise, the less “BTO budget” your project remains. Custom work solves real living problems, but it is never the cheapest path.
What a 4-room BTO usually starts with
A 4-room BTO flat is already more complete than a resale unit that needs stripping back. That changes the renovation logic. You are not paying mainly to repair old work. You are paying to adapt a standard handover into a home that suits your routine.
Most new owners are deciding around these areas:
- Do we keep the original floor finishes, or overlay them.
- Do we keep both bathrooms mostly intact, or redo parts of them.
- How much kitchen storage do we really need.
- Do we build full wardrobes now, or phase them later.
- How much concealed wiring and lighting do we want.
- Do we use built-ins to solve clutter, or live with more movable furniture.
That last point matters. Built-ins look tidy because they shift storage into carpentry. Loose furniture keeps cost lower and gives flexibility, but can make the flat feel less resolved. There is no moral answer. It is just a trade-off.
Stage 1: planning the scope before any work starts
This is the stage owners rush through, then pay for later.
Before drawings, before materials, before choosing laminates, you need a scope. Scope means a room-by-room decision on what stays, what goes, what gets built, and what is optional.
Start with how you will live, not how the flat should look
For a 4-room BTO, ask practical questions first:
- How many people are living there in the first two years.
- Whether either of you works from home.
- How much closed storage you need.
- Whether you cook daily or lightly.
- Whether the service yard needs drying, laundry storage or a stacked washer-dryer setup.
- Whether one bedroom stays as a study, guest room or future nursery.
These choices control cost more than style boards do.
A couple who cooks often may need a stronger kitchen layout and less living room carpentry. A family with a helper may prioritise utility storage and bathroom practicality over a decorative feature wall. If the scope is wrong, the finish level does not save the project.
Decide what not to do
This is where budgets stay under control.
Examples:
- Keep developer floor tiles if they are acceptable.
- Skip a TV feature wall if a console does the job.
- Use a standard wardrobe layout instead of fully customised internals.
- Leave one bedroom loose-furnished first, then build later if needed.
- Use off-the-shelf dining furniture instead of fixed banquette seating.
Owners often think budgeting means hunting for cheaper unit rates. Usually it starts with cutting low-value scope.
What to prepare before asking for quotations
- Floor plan.
- A simple room-by-room wish list.
- Must-have items versus nice-to-have items.
- Target move-in date.
- A budget range, not a secret number.
If you say only “modern Japandi” or “hotel look”, you will get a mood response, not a buildable plan. A contractor needs quantities, dimensions, finishes and actual work items.
Stage 2: site measure, layout, and quotation
Once your keys are collected and the unit can be measured properly, the real costing starts. This is where many owners discover that two quotes with the same total are not the same quote.
What should be clarified at this stage
- Exact carpentry length and height.
- Whether cabinets are base only, top only, or full set.
- Worktop material.
- Number of drawers versus shelves.
- Type of wardrobe doors, swing or sliding.
- Electrical point quantities.
- Lighting type, downlight, track light, pendant, strip light.
- Flooring material and area.
- Whether bathrooms are touched at all, partly upgraded, or more substantially redone.
Good quotations are boring. That is a good sign. They state scope clearly enough that both sides know what is being built.
Why direct build coordination matters here
When the same firm is thinking about design and build together, the quotation stage can be more grounded. A drawing that looks neat on paper may be slow, awkward or wasteful to build. A contractor sees that early.
For example:
- A decorative groove panel detail may look simple, but take time and alignment care on site.
- A floating vanity can affect concealed services and wall conditions.
- A full-height kitchen unit may need exact coordination with appliances and service points.
- A boxed-up ceiling with cove lighting may shrink the room more than expected.
None of these are impossible. They just need to be chosen with full awareness of cost and buildability.
Stage 3: approvals, scheduling and procurement
Before physical work starts, there is a quieter stage that owners often do not see. Drawings are confirmed. Work sequence is fixed. Materials are selected. Long-lead items are ordered.
This stage matters because renovation delays often begin before hacking starts. If the sink, hood, hob, tiles, laminate or lights are chosen late, everyone downstream waits.
Items usually selected early
- Kitchen layout and appliance sizes.
- Worktop material.
- Carpentry laminate colours.
- Flooring material.
- Sanitary fittings and accessories.
- Lighting plan.
- Paint colours.
You do not need to choose every cushion and chair at this stage. You do need to choose the items that affect dimensions, roughing-in and fabrication.
A note on rules and limitations
HDB flats have renovation rules and work restrictions. The exact requirements depend on the type of work. That is one reason your build team should check before any demolition or wet work starts. If something is not allowed, finding out after drawing confirmation wastes time and money.
As a homeowner, the practical lesson is simple: do not assume every layout change you saw online is suitable for every flat.
Stage 4: protection, hacking and first works on site
Once work starts physically, the first visible stage is usually protection and demolition, if any demolition is needed.
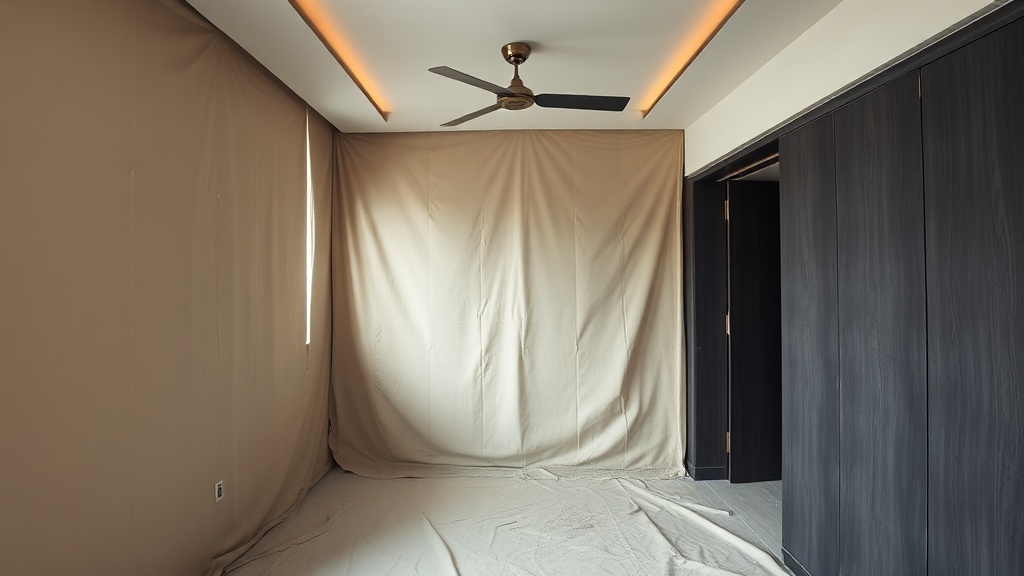
Protection means covering finished surfaces, lift access areas and common paths where required, so the work does not damage parts that are staying.
Hacking means demolition of existing finishes or structures that are approved to be removed. In a BTO, this is usually less extensive than in a resale unit. That is one reason BTO renovations can stay within a lower budget band than older flats.
Common BTO hacking decisions
- Removing selected wall tiles in kitchen or bathrooms.
- Hacking floor finishes to replace them.
- Removing kerbs or built elements, if applicable and permitted.
- Opening up or adjusting non-structural elements, subject to rules.
The trade-off is straightforward. If you keep more of the handed-over flat, your budget stays lower. If you reject more of it and rebuild, you pay twice in effect: once for demolition, once for replacement.
What owners should expect at this stage
Noise. Dust. Debris movement. Fast visual change, but not the nice kind yet.
This stage can look dramatic while not representing the most expensive part of the project. Many owners see a lot of movement and think progress is huge. Real cost often sits later in carpentry, services and finishing.
Stage 5: plumbing, electrical, air-conditioning and wet works
After demolition and opening up, the service trades come in. This is the backbone stage. If it is done poorly, nice laminates and paint do not matter much.
Electrical works explained simply
Electrical works are not just “adding lights”. They include relocating and adding power points, switches, lighting points, heater points, appliance points and sometimes network or data points.
For a modest 4-room BTO, published examples often place electrical works in the S$3,000 to S$5,000 range, but the final sum depends heavily on quantity and complexity. A simple lighting plan costs less than layered lighting with cove lights, track lights, feature lights and many switched zones.
Owners commonly underestimate this part because each extra point feels small on paper. Ten small additions no longer feel small.
Plumbing and sanitary coordination
This includes water points, basin placement, sink placement and fittings coordination. In bathrooms and kitchens, plumbing positions affect cabinet design and vice versa.
If you are changing vanity style, sink type or kitchen configuration, this stage needs clean coordination. That is one place where design and build should not be separated too far from the site reality.
Wet works
Wet works usually refer to tiling, screeding, waterproofing-related works and cement-based preparation in wet or tiled areas. In simple terms, this is the part that deals with surfaces that need to handle water and regular use.
Bathrooms are a major budget switch here. If you keep them largely intact, cost stays controlled. If you decide to redo both substantially, the project climbs quickly.
Published package examples for two-toilet overlay works are around the S$9,990 to S$10,390 mark, but package numbers should always be read carefully for inclusions and exclusions. They may not cover every fitting, accessory or special condition in your flat.
Stage 6: flooring, wall finishes and ceilings
Once the service works are settled and the surfaces are ready, the flat starts looking more like a finished home.
Should you keep original flooring or replace it
This is one of the biggest early cost decisions.
Keeping the original flooring saves money and time. The downside is you are designing around what is already there.
Overlaying with vinyl is often a middle path. It can change the look at lower cost than hacking and retiling, with quicker installation. The downside is material feel, edge detailing and suitability for certain areas need proper consideration.
Full retiling gives more control, but it costs more because of demolition, preparation, labour and materials.
| Option | Cost impact | Main benefit | Main trade-off |
|---|---|---|---|
| Keep existing floor | Lowest | Saves budget and time | Less design control |
| Overlay with vinyl | Low to moderate | Changes look quickly | Not the same as full rebuild quality |
| Hack and retile | Highest | Full finish control | More cost, more work, more downtime |
Ceilings and lighting features
False ceiling means a secondary ceiling built below the original slab. Homeowners usually choose it to conceal wiring, create cleaner light placement, or add cove lighting details.
It can make the flat look neater. It also reduces ceiling height and adds cost. In a 4-room BTO, this should be used with discipline. Doing every room just because it feels “complete” is not always wise.
Stage 7: carpentry fabrication and installation
This is where a lot of the money goes. It is also where the flat finally starts to look like the drawings.
In many 4-room BTO renovations, carpentry is the largest single cost component. Published guides commonly place it as a major share of the total budget, especially when the owners want a lot of built-in storage.
The common carpentry items in a 4-room BTO
- Kitchen base and wall cabinets.
- Tall unit for oven, pantry or household storage.
- Wardrobes for main bedroom and common rooms.
- Shoe cabinet.
- TV console or feature carpentry.
- Study desk and top storage.
- Service yard cabinets.
- Bomb shelter cladding or integrated storage treatment.
Where owners overspend without realising
- Adding display shelving that becomes dust-catching space.
- Building full-height storage in rooms that are not yet used heavily.
- Choosing many small drawer systems where shelves would do.
- Cladding too many surfaces just to hide standard walls or doors.
- Copying showroom details that look good but store very little.
A useful question for every built-in item is this: what problem is this solving? If the answer is vague, it is probably optional.
Kitchen costs in context
Published package examples for standard kitchen cabinet works sit around S$5,590 to S$6,190 for cabinet-focused packages, while fuller kitchen overlay packages are higher. The final kitchen budget depends on cabinet run length, internal accessories, worktop material, backsplash choice, appliance integration and whether any wet work is involved.
A compact kitchen can still cost a lot if every surface and detail is upgraded. A larger kitchen can remain reasonable if it is kept practical.
Stage 8: finishing works, touch-ups and defects
This stage includes the visible close-out works: painting, silicone finishing, accessory installation, cleaning, testing and defect rectification.
Defects are small problems or incomplete items that need correction before handover. Examples include laminate touch-up, paint patching, alignment issues, silicone gaps, door adjustment or hardware fine-tuning.
No real project ends with zero defects on the first pass. What matters is whether there is a proper close-out process.
What homeowners should check before handover
- Open and close every door and drawer.
- Test every light and switch.
- Check power points.
- Run water at basins and sinks.
- Check fall and drainage in wet areas where relevant.
- Inspect laminate edges, paint lines and silicone joints.
- Check that agreed accessories are installed.
- Confirm appliance cut-outs and fitting coordination.
This is not being difficult. It is normal project close-out.
How long a 4-room BTO renovation usually takes
The exact timeline depends on scope. A lighter renovation can move much faster than a full customised one. Material lead times also matter.
As a practical guide:
- Light renovation: often around a few weeks, if changes are limited and selections are made early.
- Typical full-home renovation: often around 6 to 10 weeks on site, sometimes longer depending on scope and coordination.
- More customised projects: longer, especially when there are more wet works, more carpentry, or delayed owner decisions.
The key point is this: time is not driven only by labour speed. It is also driven by decision speed, material availability and how many revisions happen after work has started.
A practical sample budget split for bto renovation 4 room planning
This is not a price list. It is a way to think about where money tends to go in a whole-home 4-room BTO renovation.
| Work category | Usually affects budget how much | What moves it up |
|---|---|---|
| Carpentry | High | More built-ins, taller units, better internals, premium finishes |
| Electrical | Moderate | More points, more lighting layers, feature lighting |
| Flooring | Moderate to high | Full retiling, larger areas, material choice |
| Bathrooms | Moderate to high | Redoing both, overlays, better fittings, more accessories |
| Kitchen | High | Longer cabinet runs, tall units, worktop upgrades, wet work |
| Painting and finishes | Lower to moderate | More colours, more surface preparation, added detailing |
If your total budget is fixed, do not try to make every category premium. Pick two or three priority areas and keep the rest sensible. For most households, those priority areas are usually kitchen, wardrobe storage and electrical planning.
Where first-time owners commonly get it wrong
1. Spending too much on look, too little on use
A stylish home that lacks proper storage becomes messy very quickly. A practical home with fewer decorative details often ages better.
2. Locking into too much built-in furniture too early
If you do not yet know how the extra room will be used, building full custom storage immediately may not help. It can be smarter to leave one room flexible.
3. Underestimating electrical needs
Extension cords all over the home usually mean the point planning was too optimistic.
4. Treating package prices as final prices
Packages can be useful starting points. They are rarely the whole picture for a genuinely customised home. Always check what is excluded.
5. Making material choices too late
Late decisions can delay fabrication and installation, especially for kitchens and built-ins.
FAQ
How much should I budget for a 4-room BTO renovation in 2026?
A practical whole-home budget is often around S$40,000 to S$65,000, based on published market ranges. A lighter renovation can come in around S$25,000 to S$35,000 if you keep more of the original handover and reduce carpentry. A more customised renovation can go beyond S$80,000, especially with extensive built-ins, bathroom changes, premium finishes and more electrical work.
Is it cheaper to renovate a BTO than a resale flat?
Usually yes, because a BTO starts newer and often needs less demolition and fewer repair works. That said, it is only cheaper if you keep some of what you were given. If you hack, retile and fully customise many areas, the budget gap can narrow quickly.
What is the biggest cost in a 4-room BTO renovation?
For many homes, carpentry is the biggest cost component. Kitchens, wardrobes and storage features add up quickly because they combine material, fabrication, hardware and installation. After that, bathrooms, flooring and electrical works are usually the next major cost drivers.
If you want, ask YC about your own flat.
Read next
- Old 3 room HDB renovation: what to expect, stage by stage, and what to budgetOld 3 room HDB renovation, stage by stage: what gets checked first, where delays happen, and what usually moves the budget.Property Types
- Commercial renovation: what to expect, stage by stage, and what to budgetA practical guide to commercial renovation, from planning and permits to handover, with what affects cost and timing in Singapore.Property Types
- 4-room BTO renovation ideas: what to expect, stage by stage, and what to budgetPractical 4-room BTO renovation ideas, what each stage involves, and how budget shifts with layout, carpentry, services and finishes.Property Types
Tell us what you are working with.
Send us the unit type and a rough idea of what you want done. We will come back with what it takes.