
5 room BTO sengkang renovation: what to expect, stage by stage, and what to budget
10 Oct 2026 · YC Design and Build
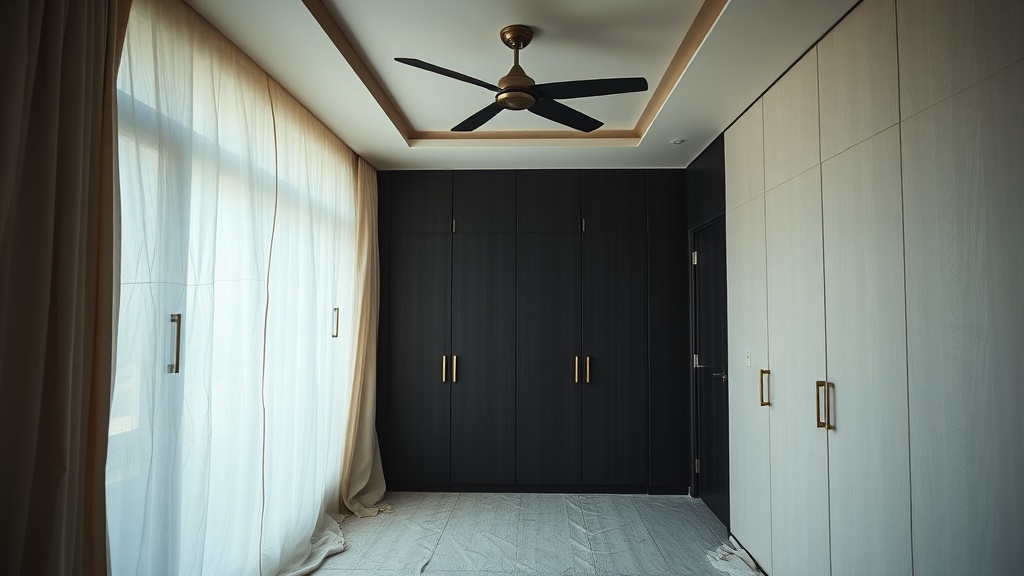
A plain guide to a 5-room BTO Sengkang renovation: stages, timeline, key cost drivers, and where budgets usually stretch.
You collect your keys, walk into a clean but plain flat, and then realise how many decisions sit between bare handover and a home you can live in. A 5 room BTO Sengkang renovation is not just about style. It is about sequence, rules, lead times, and where the money really goes.
For most households, the useful question is not, “What is the cheapest package?” It is, “What works should happen first, what can wait, and what budget fits the way we actually live?” For a 5-room BTO in 2026, a realistic full-home renovation usually lands around S$45,000 to S$70,000. If the scope is light, it can be lower. If the carpentry is heavy, finishes are premium, or you add more wet works and ceiling details, it can climb past S$70,000 and into the S$80,000+ range.
Sengkang itself does not carry a special renovation rulebook. The same HDB rules apply across towns. What matters more is your flat’s handover condition, whether the bathrooms are left as-is, how much built-in carpentry you want, and whether you are trying to finish everything before move-in or split the work into phases.
What a realistic budget looks like for a 5 room BTO Sengkang renovation
If you are starting from zero, use ranges, not single numbers. A single price usually hides scope, materials or exclusions.
| Scope level | Typical budget band | What it usually covers |
|---|---|---|
| Light renovation | S$25,000 to S$40,000 | Paint, some lighting and electrical additions, basic carpentry, simple kitchen work, selected room upgrades rather than full-home built-ins |
| Standard full renovation | S$45,000 to S$70,000 | Kitchen carpentry, wardrobes, electrical works, lighting, painting, some flooring changes, practical storage, bathroom accessories or limited upgrades |
| Higher-spec full renovation | S$70,000 to S$100,000+ | More custom carpentry, feature ceilings, more extensive flooring, premium finishes, heavier kitchen and bathroom scope, stronger design detailing |
Those are market-level working bands for 2026, not fixed rates. The main drivers are consistent across most projects:
- Carpentry volume: kitchen cabinets, wardrobes, TV storage, study tables, shoe cabinets, service yard storage, platform beds.
- Flooring scope: keep HDB finish, overlay part of the home, or redo more rooms.
- Kitchen specification: laminate and compact top is one level; quartz, more internal accessories and appliance integration is another.
- Bathroom works: simple fittings and accessories cost less than screen, vanity, storage and surface works.
- Ceiling and lighting: more light points, downlights and false ceiling add up quickly.
- Changes after confirmation: variation orders are common budget killers. A variation order means extra cost after the quote is accepted because the scope changed.
The blunt version is this: BTO owners often overspend on built-ins early, then run short on practical items like electrical points, lighting, bathroom accessories and proper storage planning. A home can look complete on drawing and still work badly in use.
Stage 1: Before design, decide what kind of renovation this really is
Before layouts, colours or materials, decide your renovation type. Most 5-room BTO projects fall into one of three paths.
1. Move-in fast, do only what is necessary
This suits owners with a tighter budget or a hard move-in deadline. You keep more of the original finish and focus on kitchen, wardrobes, lighting, paint and basic storage. The trade-off is simple: lower upfront cost, less visual cohesion, and some spaces may stay unfinished for a while.
2. Full practical fit-out before moving in
This is the most common route. You complete the dusty works, built-ins and major coordination before furniture arrives. It costs more upfront but is usually easier than renovating around daily life later.
3. Renovate in phases
This is often the most sensible if cash flow matters. Phase 1 covers what is difficult to do after move-in: flooring, kitchen, electrical, painting, key wardrobes. Phase 2 comes later: feature carpentry, study room built-ins, decorative items, extra storage. The trade-off is a less “finished” home at first, but better control of spending.
If you are not sure which path fits, list your works under three headings:
- Need now: kitchen, lights, power points, wardrobes, window coverings, drying system.
- Useful soon: shoe storage, TV unit, study table, bathroom vanity.
- Can wait: feature wall, fluted panels, display shelving, guest room built-ins.
That list usually tells you more than mood boards do.
Stage 2: Site measurement and understanding what the flat already gives you
A BTO is not a blank sheet. It comes with standard finishes, fixed service points and HDB constraints. A proper first site visit should answer practical questions, not just design ones.
- Are the provided floor finishes acceptable to keep?
- Are the bathroom wall and floor tiles acceptable to keep?
- Where are the drainage points, water points and waste pipes?
- Where is the air-con ledge or compressor location?
- Which walls are non-structural, and which are not to be touched?
- How much depth is really available for cabinets once doors and walkways are considered?
This is where direct-builder firms tend to work differently. A drawing can make a wardrobe look neat. A site-minded team will also check if the swing clearance, skirting detail, air-con trunking route and bed access still make sense when built.
For first-time owners, one useful rule is this: do not pay to replace something just because it is “standard”, if it is still functional and you do not strongly mind the look. In BTO projects, unnecessary removal often eats money that would have been better spent on storage, electrical planning or better kitchen hardware.
Stage 3: Layout planning, where most expensive mistakes begin
On paper, a 5-room flat looks generous. In use, poor planning still wastes space. This stage is about movement, storage and daily routines.
Kitchen
The kitchen is often the cost centre. Decide early whether you need:
- one run or two runs of base and wall cabinets,
- tall units for pantry and appliances,
- built-in oven or microwave niche,
- dish rack, pull-out basket or corner accessories,
- open or enclosed service yard connection.
Every added cabinet section pushes cost up. The trade-off is not “good kitchen versus bad kitchen”. It is storage versus budget, and ease of cleaning versus visual lightness.
Living and dining
Many owners overbuild this area. A large feature wall, full-height TV storage and display shelves look complete in renderings. They also increase carpentry cost and reduce flexibility. If your living room usage is mainly sofa, television and occasional guests, simpler is often better.
Bedrooms
Wardrobes are usually worth planning properly because free-standing pieces seldom use the space as efficiently. But not every room needs full built-ins on day one. If one bedroom is for future children, parents or work, consider whether a loose wardrobe and desk can bridge the next few years.
Study and hybrid rooms
This is where many 5-room owners can save money. A room intended for both work and guests usually gets overdesigned. Start with the true requirement: desk, power, data route, storage and enough clear floor area. If the function is still changing, fixed carpentry may lock you in too early.
Stage 4: Quote breakdown, what to check before you commit
When quotations arrive, compare scope, not just total price. The cheapest total may simply exclude parts another quote includes.
Ask for the renovation to be broken into work sections such as:
- demolition or hacking, if any,
- masonry works,
- flooring works,
- ceiling works,
- carpentry works,
- electrical works,
- plumbing works,
- painting,
- doors, glass and accessories,
- permits or submissions where applicable.
Then ask the plain questions:
- How many feet or runs of cabinetry are included?
- What laminate category is assumed?
- What countertop material is included?
- How many power points, switches and lighting points are included?
- Are sanitary fittings included, or only labour to install owner-supplied items?
- Are delivery, haulage and debris disposal included?
- What counts as a variation order?
If two quotes differ by a large amount, the answer is usually one of these: less carpentry, lower material allowance, fewer electrical points, lighter site coordination, or omissions not obvious to a first-time owner.
A direct main contractor approach can help here because buildability gets discussed earlier. If the people drawing also understand how the work will be executed on site, fewer items get glossed over. That does not mean the job is always cheaper. It means the blind spots are easier to catch before work starts.
Stage 5: Permits, HDB restrictions and why BTO bathrooms need extra care
Some renovation decisions are not about preference. They are controlled by HDB rules and building constraints.
In plain terms, you should expect restrictions around:
- hacking walls and floors,
- changing windows and grilles,
- certain wet-area works,
- air-conditioner installation methods,
- noise and renovation timing.
For new BTO flats, the bathrooms need particular care because waterproofing is a real issue, not a paperwork issue. Many owners hear “bathroom cannot hack” without understanding why. The reason is that wet areas have waterproofing systems below the surface. Once that system is disturbed, the risk of leakage and rectification rises. That is why surface overlay or lighter bathroom upgrading is often the more sensible route in newer flats.
This is also why a contractor-first mindset matters. Bathroom works that look simple in design can cause expensive problems if the sequence, protection and waterproofing process are handled badly.
If you are new to renovation, the safest approach is to ask not only “Can this be done?” but also “Should this be done in a new BTO?” Those are not the same question.
Stage 6: Detailed design, materials and where budgets slip quietly
Most budget overruns do not come from one dramatic decision. They come from ten small upgrades that each sound harmless.
Common examples
- Laminate upgrade across all carpentry.
- Changing from a basic worktop to a pricier stone surface.
- Adding internal drawer systems inside wardrobes and kitchen cabinets.
- Extending cabinets to full height.
- Adding fluted panels, curved details or special edge profiles.
- Adding false ceiling to more areas just to hide wiring or create light lines.
None of these are wrong. The issue is cumulative cost. For a family home, practicality usually gives a better return than decorative complexity.
A good design review should strip the project back to what earns its keep:
- Does this built-in solve a real storage problem?
- Will this surface be easy to maintain?
- Will this detail trap dust or grease?
- Are we doing this because it is useful, or because the rendering looks nicer with it?
That last question saves a lot of money.
Stage 7: Electrical planning, the part owners often notice too late
Electrical planning is rarely exciting, but it is where daily frustration starts if done badly. A point means a socket, switch, light point or related connection position.
For a 5-room home, think by activity, not by room labels.
Living room
- TV and router position.
- Standing lamp or side-table charging points.
- Robot vacuum docking if you use one.
- Dining pendant or dining lighting control.
Bedrooms
- Bedside charging on both sides if possible.
- Study table power and data needs.
- Air-con position and trunking route.
Kitchen
- Fridge, hob ignition, hood, oven, microwave, kettle, rice cooker, water purifier if any.
- Where small appliances will actually sit, not where you imagine they might sit.
The trade-off is simple: more points cost more now, but adding them later is usually harder, messier and less tidy. That said, not every wall needs a socket every metre. Plan around use, not fear.
Stage 8: Construction, what usually happens on site and how long it feels
Actual schedules vary by scope, approvals, material lead times and site coordination. It is safer to think in sequence than in promises of exact dates.
- Protection and preliminary works: site set-up, floor and lift protection where required, checking dimensions against drawings.
- Demolition or hacking: only if part of the approved scope.
- Masonry and wet works: making good walls, bases, kerbs or selected surface works.
- Electrical and plumbing first fix: concealed routes and point set-out.
- Ceiling and wall preparation: false ceiling frame, plaster details, wall treatment.
- Flooring or floor protection coordination: depending on what is kept and what is changed.
- Painting base coats.
- Carpentry measurement, fabrication and installation: usually one of the largest stages.
- Countertop, glass and final installations.
- Electrical and plumbing second fix: lights, switches, appliances, fittings.
- Touch-up, testing and defect rectification.
Owners often ask which stage is most stressful. Usually it is the period between site works starting and carpentry going in. The flat looks worse before it looks better. That is normal.
What matters is not whether a site is dusty in the middle. What matters is whether dimensions are checked properly, details are coordinated before fabrication, and mistakes are caught before they multiply.
Stage 9: Carpentry installation, where the quality of coordination shows
Because carpentry often takes a large share of a BTO budget, this stage deserves closer attention. The visible finish matters, but so do the less glamorous parts:
- alignment with walls that are not perfectly straight,
- clearance for door swings and handles,
- service access for pipes and appliance maintenance,
- ventilation for enclosed appliances where needed,
- scribing and finishing against uneven site conditions.
This is one place where a build-led team has a practical advantage. Drawings are useful. Site adjustments are unavoidable. If the workshop, installer and site supervisor are working from the same practical understanding, there is less disconnect between “looks good” and “can actually be built properly”.
The trade-off with heavy custom carpentry is worth stating clearly: you gain fitted storage and a tidier look, but you pay more, commit the room to one layout, and reduce future flexibility.
Stage 10: Handover, defects and what to check before the final close-out
Do not treat handover as a quick ceremonial walk-through. Bring a checklist and take your time.
- Open and close every cabinet door and drawer.
- Check laminate edges and joints.
- Run water at sinks and inspect below for leaks.
- Test lights, switches, sockets and appliance points.
- Check paint under daylight, not only warm interior lighting.
- Inspect silicone joints in wet areas and around worktops.
- Check glass, mirrors and stone tops for chips or scratches.
- Confirm all agreed accessories are installed.
Small defects are normal. The issue is whether they are recorded clearly and rectified properly. Keep the list factual. “Wardrobe left shutter rubbing against side panel” is better than “wardrobe not good”. Specific defects get fixed faster.
How to decide what to spend on first, if your budget is not unlimited
Most people do not have an unlimited budget. That is normal. If you need to choose, this order is usually sensible for a 5-room BTO:
- Layout and electrical planning: cheap to think through, expensive to redo.
- Kitchen: daily-use area, high practical value.
- Main wardrobes: fitted storage prevents later clutter.
- Lighting and ventilation-related items.
- Essential flooring changes only where truly needed.
- Secondary room built-ins.
- Feature elements.
If money is tight, what usually makes sense to postpone:
- full feature walls,
- display carpentry,
- guest room full-height built-ins,
- decorative ceiling details,
- special surface treatments with no storage or maintenance benefit.
What usually should not be underplanned:
- kitchen workflow,
- electrical points,
- wardrobe storage,
- service yard practicality,
- bathroom accessories and dry storage.
Common mistakes in a 5 room BTO Sengkang renovation
- Building too much carpentry too early: the rooms look complete, but you lose flexibility.
- Ignoring walkways: deep cabinets and large furniture make a decent room feel cramped.
- Choosing hard-to-clean finishes: especially near cooking areas.
- Underestimating electrical needs: extension cords appear later, which defeats the whole point.
- Treating bathroom works casually: wet areas are not where you want experimentation.
- Making decisions from renderings alone: images do not show maintenance, access or long-term use.
- Comparing quotes by total only: missing items come back later as extra cost.
The best renovation decisions usually look boring on paper. Better storage depth. Better socket placement. Better kitchen layout. Better allowance for cleaning. Those choices do more for daily life than one expensive feature panel.
FAQ
How much should I set aside for a full 5-room BTO renovation in Sengkang in 2026?
A practical working budget is usually around S$45,000 to S$70,000 for a standard full renovation. Lighter projects can be lower, roughly S$25,000 to S$40,000. Higher-spec projects with heavier carpentry, more detailed ceiling work, stronger material upgrades or broader wet works can go past S$70,000 and into S$80,000 or more.
Should I renovate the whole flat before moving in, or do it in phases?
If the budget allows, it is usually easier to complete dusty works, kitchen, electrical planning and key built-ins before moving in. If cash flow matters, phasing is sensible. Do the hard-to-redo items first, then add secondary carpentry and decorative elements later. The trade-off is that the home may feel less complete at first.
Do I need to redo the bathrooms in a new BTO?
Not always. In many new BTO flats, keeping the original bathroom finishes and upgrading only what is necessary is the more sensible choice. Bathroom hacking and major wet-area changes can be restricted and carry more waterproofing risk. Ask first whether the change is necessary, not only whether it is possible.
If you want, ask YC about your own flat.
Read next
- Old HDB 4 room renovation: what to expect, stage by stage, and what to budgetA practical guide to an old HDB 4 room renovation: stages, common site issues, timelines, and what changes the budget.Property Types
- Old 3 room HDB renovation: what to expect, stage by stage, and what to budgetOld 3 room HDB renovation, stage by stage: what gets checked first, where delays happen, and what usually moves the budget.Property Types
- Commercial renovation: what to expect, stage by stage, and what to budgetA practical guide to commercial renovation, from planning and permits to handover, with what affects cost and timing in Singapore.Property Types
Tell us what you are working with.
Send us the unit type and a rough idea of what you want done. We will come back with what it takes.